Group Feature (QR Code)
Form a group of up to about 5 people, join via QR code, and privately share a meeting point with selected members only.
How-to Video
Watch a walkthrough of the group feature (Japanese and English narration).
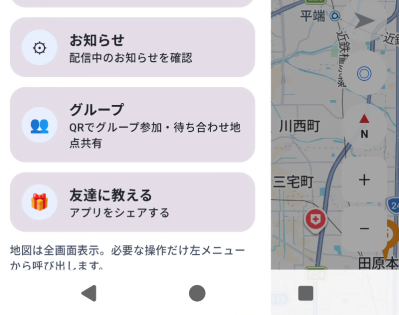
1Open the Group screen
Tap "Group" (Join via QR & share meeting points) in the side menu (☰).
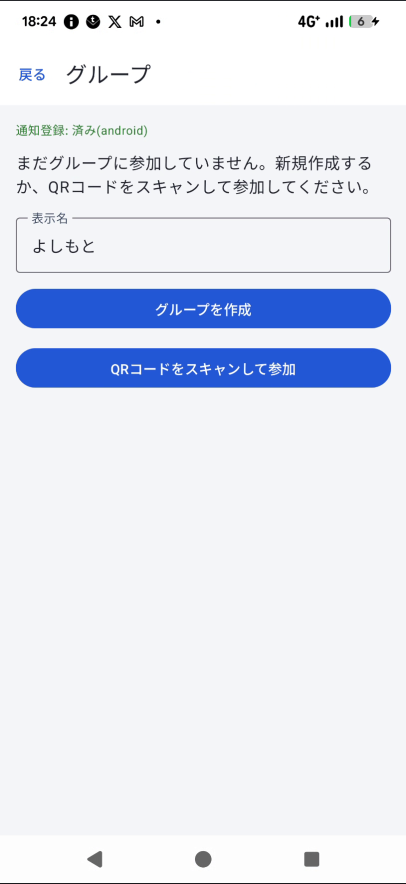
2Create a new group
If you're not yet part of any group, enter a "Display name" and tap "Create Group." Once created, an invite code and QR code are generated automatically.
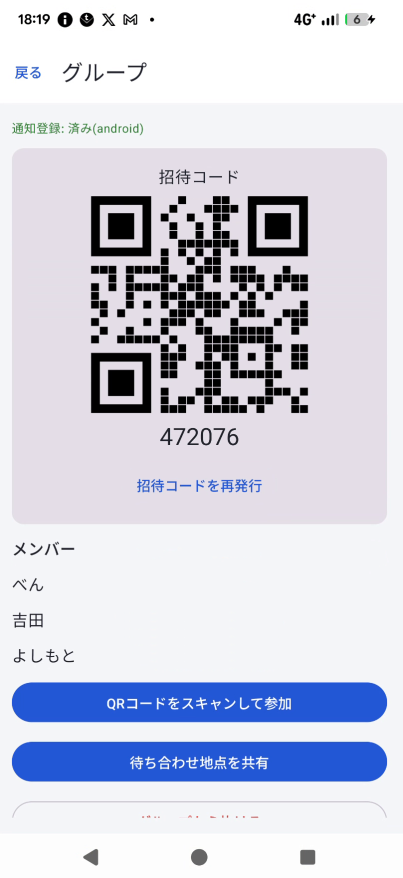
3Invite others with a QR code
Once a group is created, the screen shows a QR code for the invite, along with the invite code as text. Show this to other members and have them follow these steps:
- The person joining taps "Scan QR code to join" on the Group screen
- Their camera opens — have them scan the QR code shown on your screen
- On a successful scan, they join the group automatically
To reissue the QR code, tap "Regenerate invite code" (the old QR code becomes invalid).
While scanning, the camera view fills the entire screen, with the message "Scan the QR code" and a cancel button overlaid on top.
4Check your members
The "Members" section on the Group screen lists the display names of everyone currently in the group.
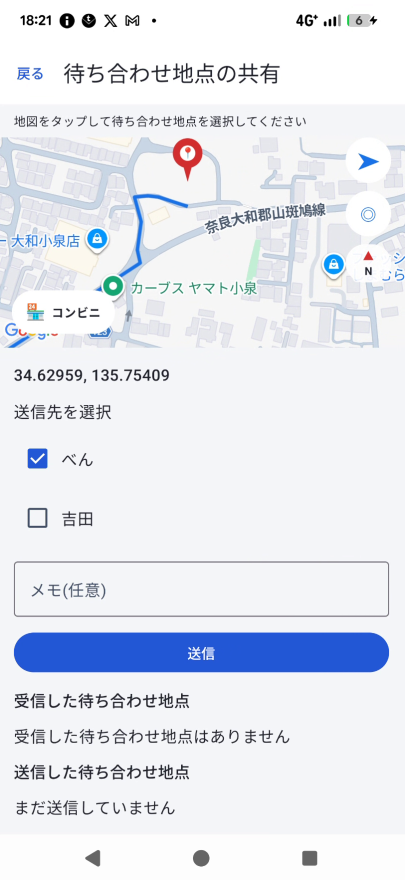
5Share a meeting point
Tap "Share meeting point," then tap a location on the map to select it. Next, check which members you want to send it to and send.
6Delete a group / leave a group
Use the buttons at the bottom of the Group screen.
- If you're the owner (creator): tap "Delete group." This permanently removes the invite code and every member's participation — it cannot be undone.
- If you're a member: tap "Leave group" to remove only yourself from the group.
Both actions show a confirmation dialog before taking effect.
In-app usage guide
You can also review the same 3-step explanation (with screenshots) at any time by tapping "See how the group feature works" on the Group screen.
Learned Location Management (automatic map labels)
Whenever you mark a delivery as complete, that location's address, lot number, and recipient name are automatically recorded, and the map permanently displays a label in the format "lot number: name" (e.g. 3-15: Tanaka) at that spot. This makes it easier to recognize a familiar delivery spot at a glance the next time you're there.
If you belong to a group, this learned data is shared within the group, so every member sees the same labels on their map. If you don't belong to a group, it's stored only on your device.
To correct a mislearned or unwanted location, open "Learned Location Management" from the side menu (☰) and tap "Delete" on the relevant entry.