Using Regular Courses
If you deliver along the same route every day, save it in advance as a "Regular Course" — then on the day itself, load it onto the map with a single tap.
1Open the Regular Course screen
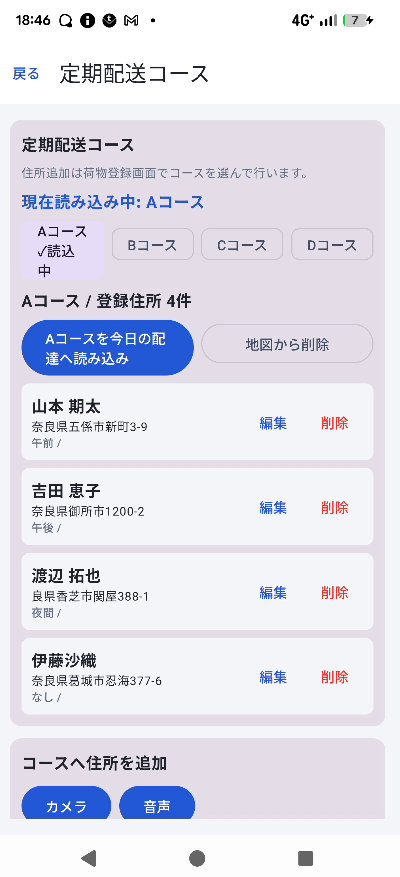
Open "Regular Course" from the side menu (☰). Courses are listed as chips, grouped by code (e.g. route name).
2Register addresses to a course
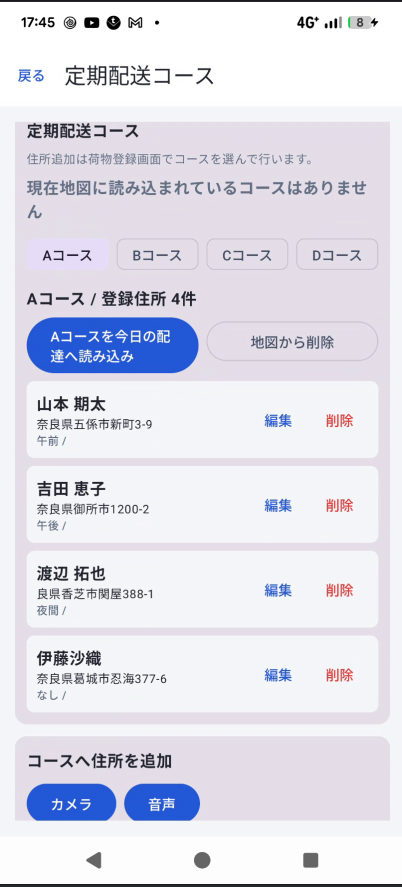
Select a course, then enter an address in the "Add address" panel. Just like the package registration screen, it supports photo (OCR), voice, and manual entry. You can also enter recipient name, time window, and notes.
After entering, tap "Add to (code)" to save it to the course. The location is also resolved automatically.
You can also open camera or voice input from the "Add address to course" section at the bottom of the screen.
3Edit or delete a saved address
Each address in a course can be edited in place — recipient name, address, time window, and notes — using the "Edit" button. Addresses you no longer need can be removed with "Delete."
4Load it onto the map on the day
On the delivery day, simply select the code you're using and tap "Load (code)" — the course's delivery addresses are reflected on the Home screen's map.
To remove it, tap "Clear." The Home screen also shows a chip reading "Showing course XX," which you can also use to clear it.